Dr. Jenny Gandhi

procedure steps

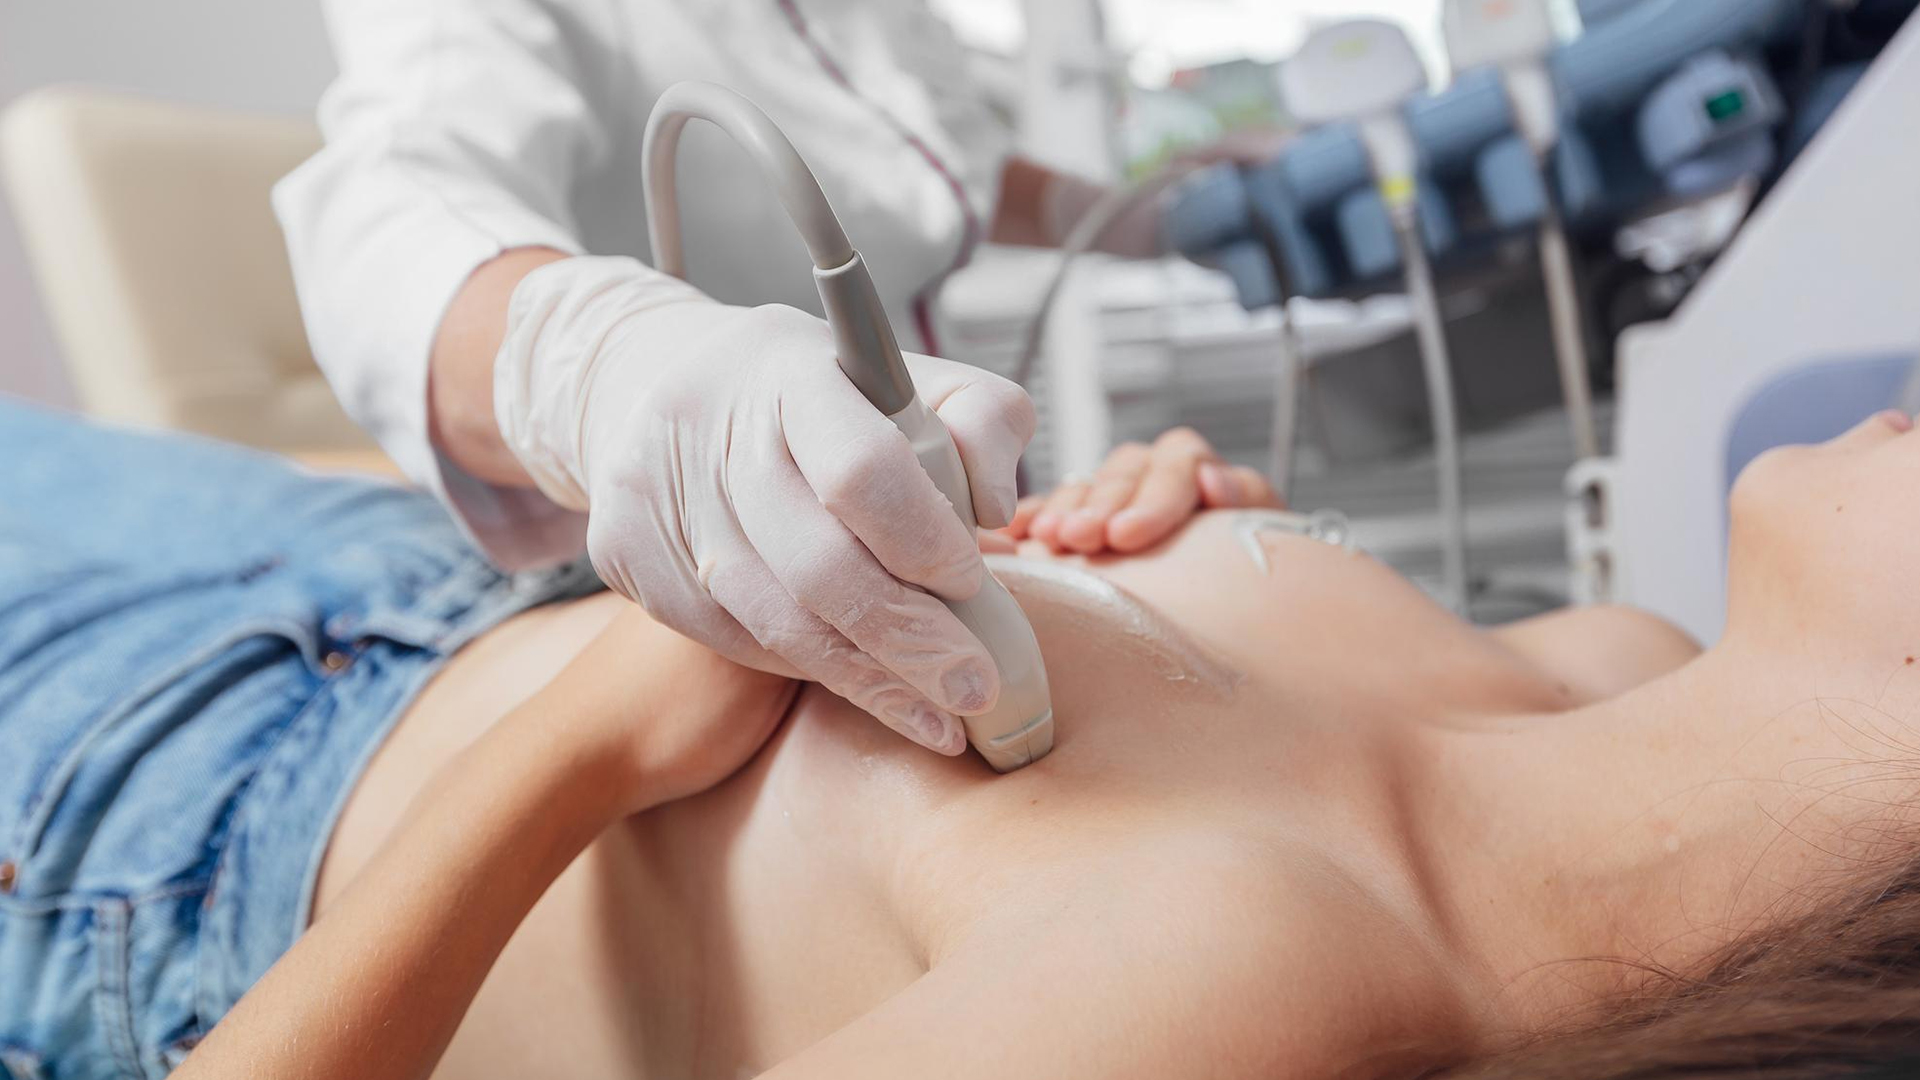
1. Positioning and Preparing the Patient

In order to expose the breast area that will be biopsied, the patient lies comfortably on the examination table, usually supine or slightly turned to the side.

2. Localization of Lesion with Ultrasound

The skin over the mass is treated with ultrasound gel. To locate and see the lump in real time, a high-frequency linear ultrasound transducer is applied to the breast.

3. Local anesthesia and sterilization

An antiseptic solution is used to clean the biopsy site. To numb the lesion location, local anesthetic is injected into the surrounding skin and deeper tissues.

4. Making an incision and inserting a needle

To make it easier for the biopsy needle to get through, a little (2–3 mm) skin incision is made. The biopsy needle is carefully inserted into the lesion through the incision while being continuously guided by ultrasonography.

5. Sampling of Tissue

Tissue samples are extracted using vacuum-assisted biopsy equipment or core needle biopsy. Repositioning the needle within the lesion allows for the collection of many samples (often 6–12) for sufficient representation.

6. Gathering and Managing Samples

For histological examination, tissue cores are gathered in formalin containers. To capture heterogeneity, samples may be obtained from several lesion locations.

7. Compression and Dressing Following Biopsy

To reduce bleeding and hematoma formation, pressure is applied over the biopsy site for five to ten minutes after the needle is removed. A sterile dressing is applied to the area.

8. Instructions for Aftercare and Patient Monitoring

For a limited while, the patient is monitored for any consequences, such as blood, discomfort, or allergic responses. Avoiding physically demanding activities and maintaining the site's cleanliness are two possible instructions.

9. Pathology and Aftercare

The patient returns for a follow-up visit to discuss the results and future treatment after the tissue is sent to pathology.

disease treated

Breat Abnormalities

Lorem Ipsum is simply dummy text of the printing and typesetting industry.

suitable for

Individuals with Questionable Breast Masses

Ideal for palpable or non-palpable solid masses seen after a physical examination, mammography, or ultrasound that are suggestive of cancer or have an unclear diagnosis.

Injuries classified as either BI-RADS 4 or 5

High suspicion lesions that require a histological diagnosis include masses, architectural deformation, or aberrant tissue alterations.

Suspicious Axillary Lymph Nodes

When aberrant or enlarged lymph nodes are found during breast cancer staging or metastatic assessment, an ultrasound-guided biopsy is recommended.

Microcalcifications Observable on Ultrasound

may be biopsy targets if stereotactic biopsy is not practical or accessible, particularly if the results are associated with mammography.

Patients Requiring Tissue Diagnosis in Order to Plan Treatment

enables a conclusive pathology diagnosis to direct treatment, preventing needless surgery when benign or quickly confirming cancer.

Patients' Preferences Outpatient Procedure with Minimal Invasiveness

Ideal for people who need a less invasive alternative to open surgical biopsy with less scarring and a speedier recovery.

benefits

Very Intrusive

By employing a tiny needle guided by ultrasound instead of an open surgical biopsy, the method reduces tissue damage and scarring.

Needle Visualization in Real Time

Real-time imaging via ultrasound enables accurate needle insertion into the lesion, improving sampling safety and accuracy.

Absence of Ionizing Radiation Exposure

Because ultrasonography employs sound waves instead of mammography-guided biopsy, it is safer and radiation-free, especially for younger or pregnant women.

Relevant to Both Palpable and Non-Palpable Lesions

Appropriate for masses that are palpable and visible on ultrasonography but not felt clinically.

Economical

It lowers healthcare expenditures since it is less costly than surgical biopsy or MRI-guided biopsy.

High Precision in Diagnosis

helps with prompt and proper treatment planning by providing trustworthy tissue samples for diagnosis.

Capacity to Biopsy Challenging Areas

useful when sampling lesions close to the nipple, axilla, or chest wall, where other methods might be difficult.

post-treatment recovery

Recuperation Time
Most patients recover quickly, returning to their regular activities in 24 to 48 hours.
Anguish and Pain
The biopsy site frequently experiences some discomfort, tenderness, and bruising, although these symptoms normally go away in a few days.
Pain management can be aided by over-the-counter medications.
Taking Care of the Biopsy Site
After the process, the biopsy site is wrapped with a tiny bandage or sterile dressing that needs to be kept dry and clean for 24 to 48 hours.
It may be recommended that patients refrain from swimming or bathing during this time.
Limitations on Activities
To reduce bleeding and swelling, heavy lifting, strenuous activity, and repetitive arm movements are usually avoided for one to two days.
Supportive Actions
Swelling and discomfort can be lessened by wearing a supportive bra.
For the first 24 to 48 hours, ice packs can be used to lessen bruising and swelling.
Keeping an eye out for issues
Patients should keep an eye out for symptoms of infection, such as redness, warmth, increasing discomfort, drainage, or excessive bleeding, and get in touch with their doctor if any of these appear.
Findings and Follow-Up
After tissue samples are sent for pathology, the results are usually ready in one to two weeks.
Based on the results of the biopsy, patients will have follow-up conversations to decide on future treatment.

Schedule Your
Consultation Today!