Dr. Jenny Gandhi

procedure steps

1. Preparing for the Procedure

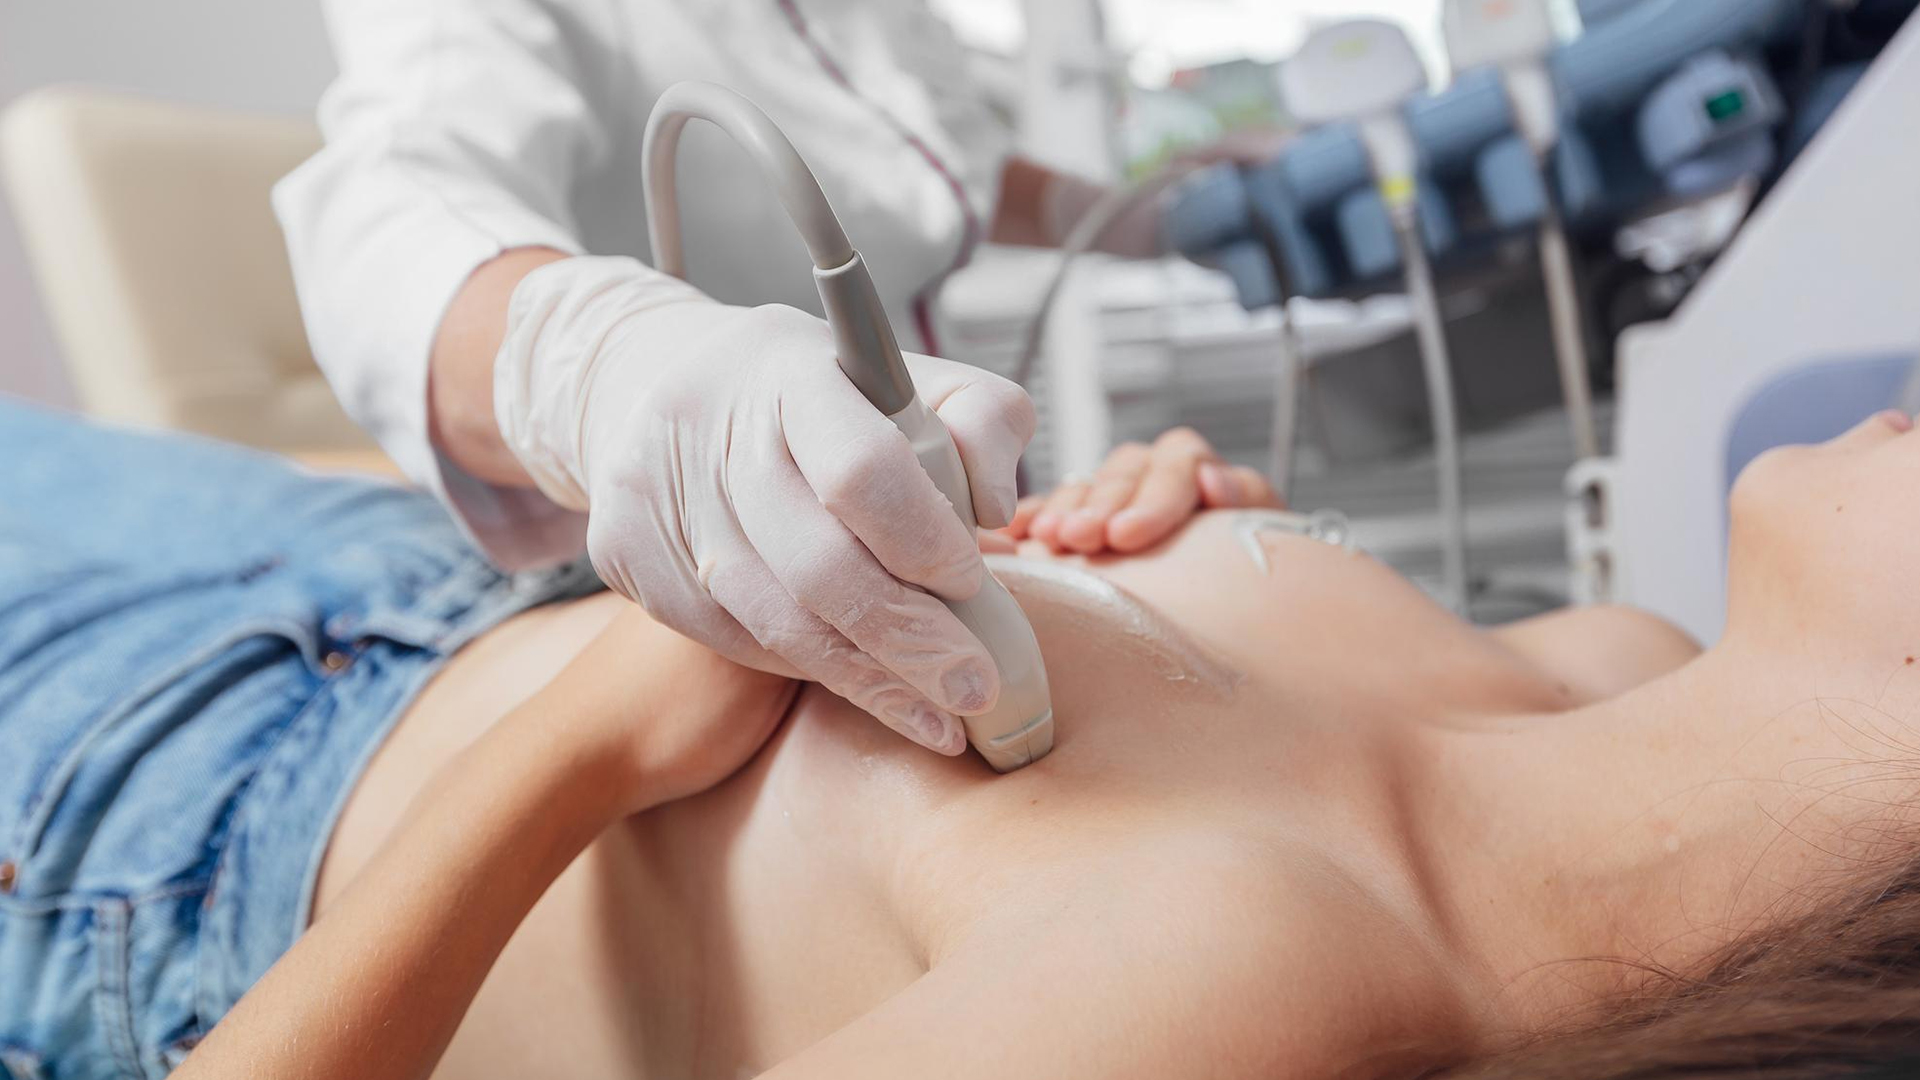
Verify the location and features of the cyst using ultrasound. Ask the patient for informed consent after discussing the risks, advantages, and options.

2. Positioning of the Patient

In order to reveal the target breast area, the patient lies comfortably, usually supine or slightly twisted.

3. Sterilization of the Site

Apply sterile drapes after cleaning the skin surrounding the cyst with an antiseptic solution.

4. Anesthesia locally

Although a tiny amount of lidocaine may be injected around the aspiration site if necessary, local anesthetic is typically not needed.

5. Localization of Ultrasound

Locate the cyst exactly in real time by placing the ultrasound transducer on the breast.

6. Insertion of Needles

Make sure the needle tip is precisely positioned inside the cyst by inserting a tiny needle (often 21–22 gauge) into the skin under ultrasound guidance.

7. Fluid Aspiration

Using a syringe attached to the needle, carefully aspirate cyst fluid while keeping an eye on the ultrasonography to verify cyst collapse.

8. Sample Management

The fluid may be submitted for cytological or microbiological study if it seems worrisome (for example, bloody or hazy).

9. Compression and Needle Removal

To stop the bleeding and avoid a hematoma, remove the needle and provide direct manual pressure to the area.

10. Dressing and Post-Procedure Care

Cover the entrance site with a sterile dressing. Give directions for aftercare, including recommendations for follow-up and indications of infection or recurrence.

disease treated

Breat Abnormalities

Lorem Ipsum is simply dummy text of the printing and typesetting industry.

suitable for

Untrustworthy Solid Masses

Any solid mass found on ultrasound that is indicative of cancer, particularly those with a BI-RADS score of 4 or 5.

Non-Palpable Injuries

Ultrasound-identified lesions that cannot be touched physically necessitate image-guided localization.

Sensible Masses

when the lump is palpable and can be precisely located with ultrasound help.

Abnormal Tissue Change or Architectural Distortion

Subtle tissue abnormalities that are challenging to identify clinically can be biopsied with the aid of ultrasound guidance.

Microcalcifications

typically in addition to mammography, particularly if ultrasonography reveals microcalcifications or if the results of the mammography are worrisome.

Lesions Near the Chest Wall or Nipple

Where stereotactic or MRI-guided biopsies may be less feasible, ultrasound provides greater access to lesions near the chest wall or nipple.

Diagnostic Explanation of Deviations

to accurately distinguish between benign and malignant tumors, offering direction for further treatment.

Patients in Need of a Quick, Secure Outpatient Biopsy

This rapid, minimally invasive, radiation-free technique is appropriate for outpatient settings.

benefits

Very Intrusive

minimizes tissue damage and leaves almost no scars by requiring only a tiny needle and a tiny skin puncture rather than a surgical incision.

Imaging in Real Time

enhances biopsy accuracy and safety by offering real-time visualization for accurate needle positioning.

Absence of Radiation Exposure

uses sound waves for imaging, which makes it safe for repeated treatments and pregnant women.

Fast and cozy

With local anesthesia, the surgery usually takes less than an hour, resulting in little discomfort and a quick recovery.

High Precision in Diagnosis

produces trustworthy tissue samples for histological diagnosis, supporting prompt and precise treatment choices.

Reachable for Different Lesions

Both palpable and non-palpable breast lesions, such as those close to the axilla, nipple, or chest wall, are effectively treated.

Economical

less expensive than MRI-guided or surgical biopsies, which lessens the burden on patients and healthcare expenses.

Quicker Recuperation In contrast to surgery

Patients can resume their regular activities more quickly following a shorter recovery period than following a surgical biopsy.

post-treatment recovery

Quick Recuperation
Patients can normally return home the same day after the surgery, which typically takes 15 to 30 minutes.
If local anesthetic is used in an outpatient setting, monitoring is short.
Anguish and Pain
It is common to experience some pain, soreness, or bruising near the biopsy site, which usually goes away in a few days to a week.
In most cases, over-the-counter medications are adequate.
Taking Care of the Biopsy Site
For the first 24 to 48 hours, keep the biopsy site dry and clean. Steer clear of swimming or immersing the area.
Unless otherwise directed, a sterile bandage or dressing is applied and should remain in place.
Limitations on Activities
To lower the risk of bleeding and edema, refrain from hard lifting, intense activity, and repetitive arm movements for one to two days.
Supportive Actions
For the first 24 to 48 hours, using ice packs and a supportive bra may help reduce bruising and swelling.
Keeping an eye out for issues
Keep an eye out for signs of infection (redness, warmth, pus), growing discomfort, and heavy bleeding.
If any of these happen, get in touch with your healthcare professional.
Resuming Regular Activities
Within one to two days following the biopsy, the majority of patients return to their regular daily activities; nevertheless, they should heed the advise of their care team.

Schedule Your
Consultation Today!